

Apply a Manual Putty
With a Manual Putty (M25, M60, M70, M80 LP, M90), knead equal volumes of both components with your fingertips for 20 seconds at most. Once the color is uniform, press the smooth face onto the clean external surface and let it polymerize.
When to Use a Manual Putty
Manual Putty needs no dispensing gun and no nozzle, as you mix the two components by hand. It suits external surfaces that are easy to reach.
Its resolution is 10 µm, against 1 µm for Fluid and Pasty products. Do not use it to inspect a surface finish or to take a complete impression of an internal shape.
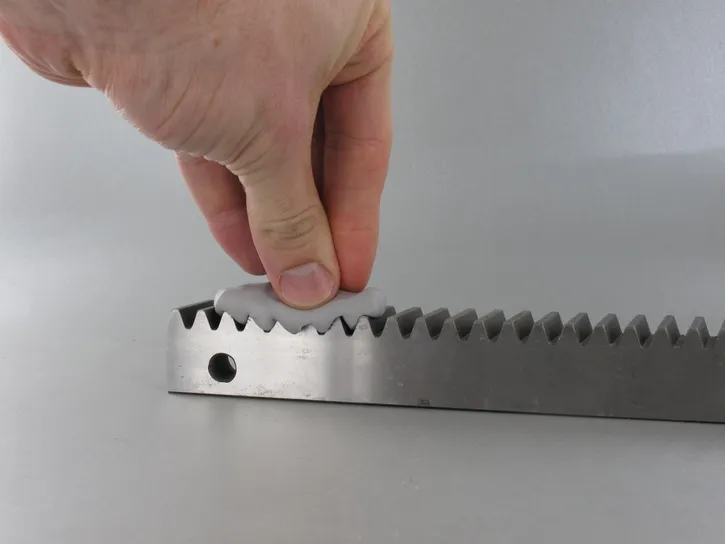
Step by Step
Polymerization starts as soon as the two components touch, so you clean the part before dosing the putty.
- Degrease the surface and wipe it dry with a clean microfiber cloth.
- Take an equal volume of each component with the dedicated spoons, judging the amounts by eye. Keep one spoon per component. Use the white spoon for the white component, never for the other one.
- Mix the two components for 20 seconds at most once they touch.
- Knead with your fingertips only, because the heat of your hand speeds up polymerization.
- Stop mixing when the color is completely uniform.
- Shape a smooth, clean face. Place that face on the part, never the streaked side.
- Apply the putty by compression, with as much contact as possible between the product and the surface.
- Let it polymerize for 4 to 5 minutes for M60 and M70, then remove the impression.

After the Impression
Close the pot with its foil seal and its cap right after use. An opened pot keeps until the expiration date printed under the pot.
Which Manual Putty
M25 is Flexible and accepts a removal constraint up to 15%. M60 and M70 are Medium. They accept 5% and you can slice them with the Double Blade Cutter. M70 is the usual choice for an external shape without an undercut.
M80 LP polymerizes slowly, so you can remove it only after 25 minutes. M90 is Rigid, for contact measurement on shapes with no undercut.
