Inject Without Bubbles
Air bubbles in an impression create voids in the measured surface. They are caused by injecting above the surface, moving too fast, or trapping air in corners.
Technique for Internal Cavities
- Start at the bottom. Place the nozzle tip at the deepest point of the cavity before squeezing.
- Keep the tip submerged. Never withdraw the tip from the material during injection. New material should push out old material, not displace air.
- Move in circles. Rub the tip against the walls in small circular motions. This releases micro bubbles trapped against the surface.
- Tip Always in contact with the surface.
- Fill slowly. Fast injection folds air into the stream.
- Add a demolding ring. After the cavity is full, slide a demolding ring over the injector and add a 1 cm grip for extraction.
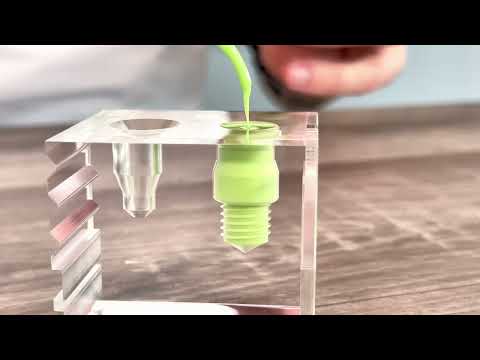
For Pasty Products
Pasty products do not use fine tips. The viscosity is too high.
- Keep the nozzle in constant contact with the surface.
- Apply slight pressure so the material penetrates details.
- The compression force will push the product into the details.
- Compress the surface gently with a flat card after application to create a flat surface.
For Tiny Diameters
Use a needle nozzle or Luer Lock nozzle for very small bores. If a bubble forms at the bottom, insert a Fill‘In spiral and move it gently in circles to release the trapped air.
Common Bubble Sources
| Cause | Fix |
|---|---|
| Tip pulled out of product during injection | Keep tip submerged at all times |
| Injecting too fast | Slow down the trigger pressure |
| Sharp corners or blind holes | Start at the deepest point, use Fill In spirals |
| Air in the mixer tip | Prime the injector until a homogeneous drop appears |
| Durty surface | Clean the surface using a validated degreaser |

