Last updated:
Gage R&R Studies measures the total gage variation as a percentage of process tolerance, helping determine if a measurement tool is suitable for inspecting parts.
I remember the first time I rejected a perfectly good batch of parts. My digital caliper said they were out of spec, but my colleague measured them five minutes later and found them well within tolerance.
It was baffling.
I assumed the tool was broken or the parts were warping, but I was looking in the wrong place.
It turns out, every time you take a measurement, you aren’t just capturing the reality of the part. You are capturing a combination of the part’s actual dimension plus the noise introduced by the tool (repeatability) and the person holding it (reproducibility).
This is where Gage R&R comes handy. It’s a bit like a noise canceling setting for your data.
It is a methodology that tells you exactly how much of your observed process variation comes from the measurement system analysis (MSA) itself versus the actual part variation. If your “ruler” is rubber, you can’t trust the measurement, no matter how precise the numbers look.
You will use this tool constantly. It is the standard way to validate shiny new equipment, compare two different devices, or verify a CMM after a repair. If you are just getting started with the concepts of QA, you might want to read about quality control first.
In this post, I’ll share how to set up and conduct a Gage R&R study so you can start trusting your data.
Let’s take a look!
Table of Contents
What is a Gage R&R Study?
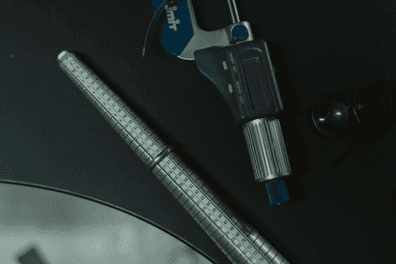
We usually assume our digital calipers and micrometers tell us the truth.
But here is the reality: every single measurement system adds its own layer of noise to your data. A Gage R&R study is the tool we use to measure that noise.
Gage R&R, where Rs stands for Repeatability and Reproducibility, is a quantitative method.
It isolates the variation caused purely by your measurement process (the tool plus the human using it) and compares it against the total variation you see in your production.
Think of it like listening to a radio. The music is your actual part variation (the signal you want to catch). The static hiss is your measurement error. If the static is too loud, you can’t tell one song from another.
Gage R&R measures the volume of that static to see if the radio is worth keeping.
This study is the central pillar of a larger framework: measurement system analysis (MSA). When you run it, you get answers to three black box questions:
- Measurement vs Process: Is the fluctuation real, or is it just the gauge acting up?
- Operator Influence: Does the result depend on who is holding the tool?
- Discrimination: Is your measurement system sensitive enough to actually distinguish between parts?
Repeatability (Equipment Variation)
This takes us to the first R in the name. Repeatability (can also be called Equipment Variation). It measures the inherent precision of the hardware itself
It asks a simple question:
If one operator uses the same instrument to measure the same characteristic on the same part multiple times, do they get the same number?
Ideally, yes.
If you get different numbers every time you measure the same steel pin, your repeatability is poor.
When this variation is high, the problem is usually the tool itself. It might be dirty, loose, or maybe it just doesn’t have the resolution needed for the tolerance you are trying to hit.
Reproducibility (Appraiser Variation)
The second R stands for Reproducibility. In statistics, we call this Appraiser Variation. This shifts the focus from the tool to the humans using it.
Here, we look at consistency across the team.
If Operator A hands the measurement tool to Operator B to measure that same part measurement, do they agree on the value?
It turns out that how you hold a caliper or interpret an analog scale varies wildly between people.
If reproducibility is the main source of error, it usually means your standard operating procedure (SOP) isn’t clear enough, or your operators need a bit more training on technique.
Why Perform a Gage R&R Study?
Imagine trying to weigh yourself on a bathroom scale that gives you a different number every time you step on it. You would never know if you actually gained weight or if the scale is just acting weird.
(In doubt, you’d probably put it on the scale like I do).
In metrology, we call this measurement error. it hides inside every single data point you collect.
This is deceptively dangerous for your quality process.
If you use Statistical Process Control (SPC) to keep your manufacturing in check, you are assuming your numbers are accurate.
But if your datas are noisy, your charts will show ghosts.
You might adjust a machine that was running perfectly, just because your measurement system lied to you.
This is where the Gage R&R study shines. It’s a high contrast filter for your variation. It separates the noise into two buckets:
- The tool itself (Repeatability)
- The human using it (Reproducibility).
It allows you to predict the percentage of error in your system so you aren’t flying blind.
When you can distinguish between a broken caliper and a training issue, you can actually fix the problem. Better data leads to clearer decisions, fewer errors, and consistently higher quality.
Types of Gage R&R Studies
When I first encountered Gage R&R, I assumed it was a single, standard test. There are actually three distinct kind of studies: Crossed, Nested, and Expanded.
Choosing the right one isn’t just a preference. It depends entirely on the physics of your measurement.
The decision usually hangs on a deceptively simple question: does measuring the part destroy it?
You also need to consider how much data you can actually get your hands on.
Using the wrong framework is a common issue that can completely invalidate your analysis, so let’s look at how to distinguish them.
Crossed Gage R&R
This is the scenario most people picture when they think of Gage R&R. It is the industry standard for a reason, but it only works if your testing method is non destructive.
In a Crossed study, the process is defined by repetition.
I can hand a specific part, let’s call it Part #1, to Operator A, let them measure it, record the data, and then hand that exact same part to Operator B. Because the part went through the process unchanged, every operator measures every part multiple times.
This creates a cross of data points where all factors overlap perfectly.
Nested Gage R&R
This is where destruction forces your hand.
If your measurement involves a tensile test, a crush test, or a chemical analysis that consumes the sample, you physically cannot hand the same part to a second operator.
It’s gone.
In a Nested study, we accept that we can’t measure the same part twice. Instead, we have to rely on the concept of batches.
We assume that parts coming from the exact same batch, mold cavity, or short production run are identical enough to represent a single data point.
The operators are essentially “nested” within the batches:
- Operator A measures parts 1 through 5,
- Operator B measures parts 6 through 10.
Operator B never sees the parts Operator A touched.
The challenge here is the Homogeneity Assumption.
For this to work, the variation between Part 1 and Part 2 must be negligible compared to the measurement error we are trying to find.
If your manufacturing process has high variation within a single batch, the Nested study will misinterpret that part variation as measurement error.
Expanded Gage R&R
Sometimes real life is just too messy for the standard models. The Crossed and Nested studies assume a relatively clean world: usually two operators, one gage, and a set of parts.
But what happens when you introduce extra variables?
The most common trigger for this is the introduction of fixtures. If you are measuring a part that snaps into a holding fixture, you aren’t just measuring the part.
You are actually testing the fixture’s ability to hold the part consistently.
If you have two different fixtures, that is a new variable that a standard Crossed study will lump into error. An Expanded study can isolate “Fixture” as its own source of variance.
This framework is also necessary for unbalanced designs.
In a perfect world, every operator measures every part three times. In the real world, Operator A might miss a shift, or a part might get lost.
Standard calculations often choke on missing data, whereas Expanded calculations (which generally use a General Linear Model) are more robust to these imperfections.
However, I advise caution here.
Expanded studies require significantly more data to get statistically significant results because you are slicing the pie into smaller pieces (Part, Operator, Gage, Fixture, Interaction, etc.). Don’t use it just to look sophisticated; only use it if you genuinely suspect a third variable is driving your measurement variation.
Calculation Methods
Once you have collected your data, you need to process it to understand your measurement system analysis.
There are two primary ways to conduct these calculations: The Average and Range method and the ANOVA method.
Regardless of which method you choose, both aim to estimate the same three error components: repeatability (equipment variation), reproducibility (appraiser variation), and part-to-part variation.
The goal is to isolate these factors so you can see exactly where the variation is.
Average and Range Method
This is the classic approach. It is very simple and is often calculated manually because the math is straightforward.
It relies on the average range of your measurements to estimate the variation. You use a specific statistical constant (known as d2*) to determine the standard deviation for repeatability.
While this methods acts as a great sanity check, it has a blind spot.
It assumes that operators and parts do not interact. It cannot tell you if a specific operator struggles with one specific difficult part while measuring easy parts perfectly.
ANOVA Method
The ANOVA method (Analysis of Variance) is the industry leader of metrology.
Unlike the previous method, ANOVA divides variance into four specific categories:
- Part variance,
- Appraiser variance,
- The interaction between them,
- Replication error.
This gives you a much better picture of reality.
Because it can distinguish the relationship between appraisers and parts, almost all modern software uses this calculation.
It catches those subtle gotchas in your process. For more technical details on the statistics involved, you can refer to the ASQ guide.
Prepare for a Gage R&R Study
Before you start measuring, we need to handle the setup. A Gage R&R study is sensitive to how you prepare your data.
If you feed it bad inputs, even the best analysis software will spit out useless numbers. Think of this like a blind taste test: if you want to test a chef’s palate, you can’t just give them three identical bowls of soup.
You need variety. It is the biggest problem in the process: part selection.
You need 5 to 10 parts that represent the entire range of your process variation. Don’t just pick the golden parts. You want the good, the borderline, and the bad.
If the parts are too similar, the math struggles to distinguish between actual part differences and measurement error.
Once you have your calibrated equipment and trained operators, here is the standard recipe for a robust study:
- 2 to 3 Operators
- 5 to 10 Parts (spanning the full process range)
- 2 to 3 Trials (measurements per part per operator)
You also need to be strict about randomization.
If an operator measures Part 1, then Part 2, then Part 3 in the same order every time, they might subconsciously remember the measurement values.
You have to randomize the order for every trial to keep it honest. Finally, clearly define your unit of measure (inches, microns, etc.) so your percent tolerance calculations actually make sense later.
Collect Data
Collecting the data sounds straightforward, but this is actually where most studies go off the rails.
It turns out, the biggest enemy of a good Gage R&R study is human memory. If an operator remembers that “Part 4” measured a little high last time, they might subconsciously nudge their technique to match that previous result.
This creates a feedback loop that hides the real variation.
To beat this, you need to treat your data collection like a double blind experiment. You must break the pattern.
The standard practice is to have multiple operators measure the same set of parts, but you never let them see the part numbers.
More importantly, you have to randomize the order for every single trial. This randomization prevents the “muscle memory” of the measurement from polluting your data.
When you record the results, you need to capture four specific data points for the math to work later:
- Operator ID
- Part ID (hidden from the operator)
- Measurement Value
- Trial Number
This rigorous approach is the backbone of reliable industrial metrology. If you skip the randomization, you aren’t measuring the capability of the tool anymore. You are just measuring the operator’s ability to remember their previous guesses.
Calculate Gage R&R Results
Now comes the moment of truth.
Once you have collected your data, you need to translate those raw numbers into a scorecard for your measurement system. We rely on three key metrics here: % Contribution, % Study Variance, and % Tolerance.
Think of these as different lenses for viewing the same problem:
- % Contribution helps you pinpoint the source of variation (like a diagnostic tool),
- % Study Variance evaluates the measurement system’s variation relative to the total variation observed in the study (like checking adequacy against process noise),
- % Tolerance tells you if the gage is actually precise enough to trust against your customer specifications.
Interpret Results
You have crunched the numbers. Now comes the moment of truth. Interpreting these results is arguably the most important part of the entire measurement system analysis.
We generally use the percent tolerance or % Study Variance to rate the system against industry standards:
- Under 10%: Acceptable. The system is trustworthy.
- 10% to 30%: Conditional. It might work for low-risk applications, but you should keep an eye on it.
- Over 30%: Unacceptable. You need to fix the measurement process before trusting the data.
If your results fall into the “fix it” category, look at the breakdown.
If repeatability is significantly larger than reproducibility, the issue is likely the gage itself. It might be loose, dirty, or difficult to position.
If reproducibility is the larger problem, the issue is usually the people. Your operators probably need training on how to hold or read the tool consistently.
Graphical Analysis Methods
Reliance on raw calculations is tempting, but numbers can be too simple for some cases.
You might get a passing percent tolerance score and still miss weird patterns in the data. This is where graphical analysis is useful. It validates your study findings and offers insight that a spreadsheet simply cannot match.
Just remember the golden rule here: these graphs illustrate measurement system effectiveness, not manufacturing process performance. We are grading the ruler, not the object.
Common Mistakes
It turns out that the math (whether you use the Average and Range or the ANOVA method) is rarely the problem.
The real one happen during the setup.
The most frequent mistake is selecting parts that are too perfect. It sounds counterintuitive, but your sample parts need to represent the full range of the process variation.
If every part is statistically identical, the only variation the study detects is the measurement error. This artificially inflates your error ratios, making a perfectly good measurement system look terrible because there is no part to part variation to compare it against.
If operators consistently measure parts in likelihood (1, 2, 3…), they will unconsciously memorize values. Always randomize the presentation order for every single trial to avoid this bias.
Environment is another problem to consider.
If you are measuring metal parts and the temperature swings by a few degrees between the morning and afternoon trials, the parts effectively change size.
At that point, you aren’t measuring repeatability and reproducibility, you are measuring thermal expansion.
Keep the environment consistent.
Improve Measurement System Performance
High variation numbers in a Gage R&R study can be frustrating, but they are also a map. They tell you exactly where the measurement system analysis found a weak link. Ideally, you want the variation to come from the parts, not your tools.
If you find high repeatability error, the issue is usually the hardware. The gage itself has the jitters. It is like trying to weigh a feather on a shaky table.
- Calibrate the equipment or perform deep maintenance to tighten loose mechanics.
- Replace worn components like clamping fixtures that might shift during use.
- Control the environment by reducing vibration or stabilizing temperature.
If you see high reproducibility error, the issue is the method. Your operators are likely holding the part or reading the display differently. It turns out, small habits create big data gaps.
- Standardize procedures so every person uses the exact same technique.
- Train operators to interpret the gage consistently.
- Create visual work instructions (pictures are great here) to remove ambiguity.
Sometimes, the tool simply isn’t precise enough. If your percent tolerance remains high despite your best efforts, the gage likely lacks the necessary resolution. In that case, you have to replace the equipment with a higher-precision device.
Quick Tip: You aren’t finished after you make improvements. You must re-run the Gage R&R study to validate that the changes actually reduced the variation.
Conclusion
We explored the mechanics of Gage R&R, and hopefully, you can see it is more than just a compliance checkbox.
It works like a high definition lens for your production line.
Without it, you are essentially driving in the fog, guessing whether variations come from your actual manufacturing process or just the measuring tools themselves. By quantifying repeatability and reproducibility, you give yourself the ability to confidently trust your data.
Measurement systems drift, tools get dropped, and new operators join the team.
Making these studies a regular habit ensures your quality data stays relevant over time. I highly recommend keeping a solid paper trail of every study you run. It saves major headaches during audits and helps you spot long term trends that might otherwise slip by.
So go grab a handful of parts and run some numbers!
Even a quick study can reveal surprising things about your process. High quality data is the foundation of everything we do here, so it pays to make sure that foundation is solid.
Happy measuring!
Frequently Asked Questions
What is the main purpose of a Gage R&R study?
It calculates how much of your process variation comes from the measurement system itself. You use it to verify that the differences you see in data are actual part differences, not errors from the gage or the operator. This confirms your inspection process is valid.
When is it appropriate to perform this study?
You should conduct this study whenever you introduce new measurement equipment or train new operators. It is also necessary before you begin a process improvement project to confirm your baseline data is reliable. Finally, run it periodically to check that your measurement system remains stable.
What is the difference between repeatability and reproducibility?
Repeatability measures the variation when one person measures the same part multiple times using the same tool. Reproducibility looks at the variation between different people measuring the same part. Together, they define the total precision of your measurement system.
How many operators and parts usually go into a study?
A standard study typically requires two or three operators and ten parts. Each operator should measure every part at least two or three times. You need to select parts that represent the full range of your process variation to get accurate results.
What are common mistakes during data collection?
The most common error is failing to randomize the order of measurements. If operators know the part values or remember previous readings, the data becomes biased. Also, make sure parts span the full tolerance range so you do not underestimate process variation.
What is the difference between Crossed and Nested studies?
You use a Crossed study when operators can measure the same parts multiple times without destroying them. If the test destroys the part, you must use a Nested study. In Nested studies, you assume the batch is consistent since you cannot re-measure the exact same item.
When should I choose the ANOVA method over Average and Range?
The ANOVA method is generally preferred because it is more comprehensive. Unlike the simpler Average and Range method, ANOVA calculates operator-part interactions. This helps you see if specific operators struggle with specific types of parts. Modern software usually defaults to ANOVA for this reason.
How do I interpret high reproducibility in my results?
High reproducibility means different operators get different results for the same parts. This usually points to inconsistent training or unclear work instructions. You can often fix this by creating visual guides or retraining your team on the correct measurement technique.
What does the % Tolerance metric indicate?
This metric compares your measurement variation specifically to your customer specifications. It tells you if your gage is precise enough to distinguish between good and bad parts. If this percentage is too high, you might reject good parts or accept bad ones.
What indicates an interaction between operator and part?
An interaction happens when some operators measure certain parts consistently higher or lower than others. You can see this in an interaction plot where lines cross each other non-randomly. This suggests the measurement difficulty changes depending on the part size or geometry for specific operators.