Last updated:
Eddy currents are circular electric currents that naturally occur in conductive materials as a response to variations in magnetic flux, creating their own opposing magnetic fields.
This technique relies on the electromagnetic induction principle.
It is the same physics that wirelessly charges your electric toothbrush or iPhone, but repurposed to hunt for structural defects with incredible precision.
This method is widely used in modern Non-Destructive Testing (NDT).
The concept is complex. We use a coil to induce tiny, circular currents into conductive materials.
If those currents flow smoothly, the part is good. But if they hit something, like a crack or a void, the flow changes, and the instrument alerts us instantly.
Why does this matter?
In high stakes industries like aerospace and Oil & Gas pipelines, a flaw invisible to the human eye can have catastrophic repercussions.
We need a way to “see” these defects without altering the part. Eddy Current Testing gives us that visibility, allowing for rapid surface crack detection and material sorting capabilities that other methods simply cannot match.
In this post, I want to help you build a solid mental model of how this actually works.
We are going to pop the hood on the physics, explore the equipment, and understand exactly why this method is so effective for verifying quality. We will look at everything from the behavior of the magnetic fields to the specific probe types used in the field.
Let’s get into it.
Table of Contents
What is Eddy Current?
When we talk about Non Destructive Testing, we often use magic tools without wondering about the physics powering it. You wave a probe over a part, and suddenly you know if there is a tiny crack hiding underneath.
But what is actually happening inside that metal? It all comes down to Eddy Currents.
The name gives us a huge clue about how this works. Think about a river flowing downstream. If you stick a paddle into the water, the current swirls around the obstacle in circular patterns.
In fluid dynamics, these swirling whirlpools are called “eddies”.
In our world of metrology, the “river” is a conductive material (like aluminum or copper), and the “paddle” is a changing magnetic field.
When that field hits the conductor, it pushes the electrons into closed circular loops of electric current.
These are your eddy currents.
These currents don’t just spin idly, though. They create their own magnetic field.
This new field opposes the original field that created it. This behavior is known as Lenz’s Law.
It is this “push and pull” between the two magnetic fields that allows us to detect flaws.
If a crack disrupts the current flow, the pushback changes, and our instrument detects the difference.
For this to work, you need exactly two ingredients. First, the material must be electrically conductive.
Second, the magnetic field has to change over time, which is why we typically use alternating current in our inspection probes.
Electromagnetic Induction Principle
If you have ever held a probe over a metal part and watched the signal dance on the screen, it can feel a bit like magic.
You aren’t touching the surface, yet you know exactly what is happening inside.
It is the electromagnetic induction principle in action. This is the physical engine that drives the entire inspection process.
When you bring a changing magnetic field (like the one in your probe) near a conductor, those invisible magnetic lines “cut” through the material.
This change creates an electromotive force, or EMF.
Think of EMF less like a solid object and more like electrical pressure. It pushes the free electrons in the metal, forcing them to move.
The magnitude of this push depends heavily on the resistivity of the conductor and the magnetic permeability.
If the material is highly conductive, the electrons flow easily. if it’s resistive, they struggle, generating heat instead of strong currents.
The Lorentz Force
Let’s zoom in to the atomic level for a second.
The force actually steering these electrons is called the Lorentz force.
When your probe’s magnetic field sweeps through the material, it physically pushes the charge carriers (electrons).
Because of the physics defined by the right hand rule, this force acts perpendicular to the magnetic field lines.
Instead of flowing in a straight line, the electrons are shoved into circular paths. These swirling loops of current look a lot like eddies in a river, which is exactly where we get the name.
Mutual Inductance and Self Inductance
To really understand the probe’s behavior, we have to distinguish between two types of inductance.
First, there is Self Inductance.
This is the coil’s resistance to changes in its own current. When you run alternative current through the coil, it creates a back EMF that fights the current flow.
This is what sets the baseline impedance of the probe in air.
Then, there is Mutual Inductance.
This is the connection between the probe and the test part.
When the probe’s magnetic field cuts through the part, it induces eddy currents. Those eddy currents, in turn, generate their own magnetic field that cuts back across the probe coil.
This mutual exchange of energy is how the part “talks back” to the instrument. The strength of this mutual inductance depends on how close the probe is to the part (coupling) and the material properties.
This interaction is what we are actually measuring. If a defect like a crack interrupts those current loops, the secondary field weakens, the balance shifts, and your instrument alerts you to the problem.
Remember that this opposition is instantaneous. The moment the magnetic flux changes, the material fights back, making this method incredibly fast for scanning large surfaces.
How Eddy Current Inspection Works
Imagine you are holding a metal aircraft part. It looks perfect to the naked eye, but we need to know if there are tiny, invisible fractures hidden just below the surface.
The process happens in a few distinct steps:
First, we send an alternating current through the probe coil.
When we bring this coil near a conductive material, the magnetic field forces electrons in the part to move.
Those eddy currents create their own magnetic field that opposes the probe’s field. The probe effectively “feels” this opposition.
If the currents hit a defect they are forced to detour.
It is exactly like water flowing around a rock in a stream. This disruption weakens the secondary magnetic field, and the instrument instantly flags the change.
The Impedance Plane
If you have ever looked at an eddy current instrument screen, you have probably seen a “flying dot” moving around a grid.
This is the Impedance Plane, and it is the most important visualization tool we have.
It maps two variables simultaneously: Resistance (R) on the horizontal axis and Inductive Reactance (XL) on the vertical axis.
When the probe is in the air, the dot sits at a specific point (high reactance, low resistance). As you bring it down to a conductive part, the dot traces a curve commonly called the Lift off Curve.
Once the probe lands on the surface, that point becomes your “null” or zero point.
When the probe hits a defect, the dot moves away from that null point. But here is the critical part: the direction matters :
- A surface crack might cause the dot to move up and to the right.
- A change in conductivity might make it move horizontally.
- Corrosion might send it in a different direction entirely.
This angle of movement is called the Phase Angle.
By analyzing the phase angle, an operator can tell you what the defect is, not just that there is one. They can distinguish between a crack, a conductivity shift, or just the probe lifting slightly off the surface.
Signal Phase Lag
Another fascinating aspect of signal analysis is Phase Lag.
As eddy currents penetrate deeper into the material, they don’t just get weaker (attenuation), they also get delayed in time.
It takes a finite amount of time for the magnetic field to propagate down and for the reaction field to propagate back up.
This time delay manifests as a phase shift on your screen. The deeper the defect is, the more the signal rotates clockwise on the impedance plane.
This is incredibly useful because it allows us to estimate the depth of a flaw. A surface crack might appear at 0 degrees, while a subsurface crack at 1mm depth might appear at 45 degrees.
It gives us a 3D understanding of the part from a 2D screen.
Penetration Depth
There is a “gotcha” here, though.
Eddy currents are lazy. They prefer to flow right on the surface of the material, a phenomenon known as the skin effect.
The deeper you go, the weaker the currents become.
In optimal conditions, eddy current inspection can detect surface cracks as small as 0.5mm, making it a staple in aerospace safety checks.
If you need to look deeper into a part, you can’t just turn up the power. You actually have to lower the frequency.
Lower frequencies penetrate deeper but are less sensitive to tiny defects.
We calculate this specific depth (where the current density drops to about 37% of the surface value) using this formula:
In this equation, f is frequency, μ is magnetic permeability, and σ is conductivity.
It highlights why understanding your material properties is so important before you even turn the machine on.
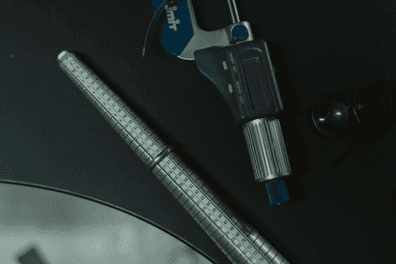
Different Probe Types
Choosing the right probe is the single most important decision you will make during an inspection setup.
It is tempting to think a probe is just a coil of wire, but the specific geometry of that coil completely changes how the physics behave.
I like to think of the magnetic field like a flashlight beam.
If you want to inspect a tiny crack in a bolt hole, you need a focused laser beam.
If you want to check a long pipe for general wall thinning, you need a broad floodlight. We classify probe types based on how they shape this energy field and, partially, how they listen for the echo.
Let’s explore our options.
Surface Probes
These are your daily drivers for flat elements or slightly curved parts.
We usually split these into two subcategories based on how they process the signal.
First, you have Absolute Probes. These use a single sensing coil to measure the total impedance of the material beneath it.
They are fantastic for finding gradual changes, like conductivity shifts or coating thickness variations. However, they are sensitive to temperature changes.
Then you have Differential Probes. These are the true defect hunters.
They contain two coils that constantly compare the material at two widely spaced points (or sometimes focused on one spot).
If the material is the same under both coils, the signal is zero. But if one coil crosses a crack while the other sees solid metal? You get a sharp, distinct signal “blip.”
Because they are self-referencing, they cancel out gradual changes like temperature or conductivity, making them much quieter and more sensitive to cracks.
Advanced Probe Designs
Beyond the basics, engineers have developed some clever designs to solve specific problems. Reflection Probes (or Driver Pickup probes) separate the jobs:
- One coil generates the field (Driver)
- Another listens for the response (Pickup).
This decoupling allows for much wider frequency ranges and better signal to noise ratios.
We also have Shielded Probes.
Standard coils have a magnetic field that spreads out like a donut.
If you try to inspect near a bolt head or an edge, that spreading field hits the geometry and creates noise.
Shielded probes use a ring of ferrite or other shielding material to focus the magnetic field straight down, keeping it tight and preventing it from “seeing” things you don’t want it to see.
Bobbin and Encircling Coils
Sometimes using a pencil probe to scan a part is like painting a hallway with a toothbrush. When you have cylindrical geometry, you want coverage.
Bobbin Probes are designed to slide inside a tube, inspecting the entire inner circumference at once. This is the standard for checking heat exchangers in power plants for exemple.
It provides a complete 360° view as you pull it through.
Encircling Coils work the opposite way.
The part (like a wire, rod, or tube) passes through the coil. This is incredibly fast for manufacturing lines, but there is a catch to watch out for.
With encircling coils, the “Fill Factor” is critical. If the coil is too big for the part, the magnetic coupling drops off rapidly, and your sensitivity to defects disappears.
Eddy Current Array (ECA)
If standard probes are like a single flashlight, Eddy Current Array (ECA) is like a stadium floodlight system.
ECA probes contain rows of multiple coils arranged in a specific pattern. Instead of scanning back and forth with a single coil (raster scanning), you can sweep a wide area in a single pass.
The software stitches the signals from all these coils together to create a C-Scan image which is essentially a color coded map of the surface.
This allows you to see the shape and length of the crack on the screen, rather than just interpreting a moving dot.
ECA is revolutionizing the industry because it is faster, less dependent on operator hand stability, and provides a permanent digital record of the inspection.
Conductive Materials Testing
Here is the biggest con of eddy current testing: it has a very strict invite list. This method only works on materials that conduct electricity.
If you try to inspect plastic, glass, or ceramic, you will get absolutely zero signal.
To understand why, we need to look at what is happening on the atomic level.
For eddy currents to form, you need electrons that are free to move when the the magnetic field appear. In conductive metals, these free electrons drift easily into those circular loops we want.
In insulators, the electrons are stuck in place. No flow means no eddy currents.
This is why this inspection method is the heavy hitter for aluminum, copper, titanium, steel alloys, and nickel alloys. It is standard practice in aerospace and manufacturing for checking everything from fuselage skins to engine blades.
If you are manufacturing products using non-conductive materials, you need another solution.
IACS Conductivity Standards
We measure conductivity using the IACS (International Annealed Copper Standard) scale. Pure annealed copper is defined as 100% IACS.
Aluminum alloys might range from 30% to 50% IACS, while titanium is much lower, around 1.5% to 3.5% IACS (Ti-6Al-4V at ~2.3%).
Why do we care?
Because conductivity changes with material properties. If an aluminum part was heat treated incorrectly, its conductivity will shift.
If a material is stressed or fatigued, its conductivity can change.
We can use eddy current instruments not just to find cracks, but to verify that the metal itself is in the right metallurgical state.
Ferromagnetic vs Non Ferromagnetic
Testing non-ferromagnetic materials like aluminum or copper is usually the easiest path in eddy current inspections.
They don’t have strong magnetic properties of their own, so the probe’s field passes through them predictably.
The signal you get is clean and easier to interpret.
Ferromagnetic materials like carbon steel are a bit more distinct. They have high magnetic permeability, which means they absorb magnetic flux very aggressively.
The problem?
This permeability varies wildly across the surface of the part, creating background noise that can hide the signals from actual cracks.
To solve the noise issue in steel, we often use magnetic saturation.
We apply a strong static DC magnetic field to the part, essentially filling up its magnetic capacity until it behaves more like a non-ferromagnetic material. It is a clever workaround that quiets the noise.
Real-World Applications
Let’s look at where this technology is actually used.
Aerospace
If you have ever flown on a commercial airliner, you have relied on eddy current testing.
The fuselage of a plane is made of overlapping sheets of aluminum held together by rivets. These lap joints are prime spots for fatigue cracks to form around the fastener holes due to the constant pressurization cycles.
Inspectors use specialized Ring Probes or sliding probes to scan these rows of rivets. The eddy currents can penetrate the top layer of aluminum to find cracks initiating in the layer below, all without removing the paint or the rivets.
This capability is critical for airline maintenance schedules.
Nuclear Power Plants
In a nuclear power plant, the steam generator contains thousands of small tubes that carry hot, radioactive water. If one of these tubes leaks, it is a major safety incident.
Bobbin probes are pushed through these tubes at high speed to check for corrosion, pitting, or fretting wear from the support structures.
Since the tubes are non ferromagnetic (usually Inconel), eddy current is the perfect tool for the job.
Advantages of Eddy Current Testing
If you have ever spent an afternoon scrubbing sticky couplant gel off a turbine blade after an ultrasonic test, you know the struggle.
This is where Eddy Current testing feels a bit like magic.
The biggest win here is that it is a non contact method. Because the electromagnetic field travels freely through air, you do not need any physical coupling medium (like water, gel, or oil) between the probe and the part.
The link is the magnetic field itself.
This keeps the part clean and completely skips the pre cleaning ritual that may slows down other NDT methods.
Because there is no physical friction or fluid drag, inspection speeds can be exceptionally fast. Automated production lines often run wire or tubing inspections at speeds exceeding 20 meters per second.
It is also surprisingly sensitive.
We are not just talking about big, obvious gouges giving off a signal.
A well calibrated setup can detect surface breaking cracks as tight as 0.5mm. The probe basically senses the microscopic interruption in electron flow, allowing you to spot fatigue cracks or stress fractures long before they become visible to the naked eye.
This contactless nature makes it ideal for automation. Since you don’t need to ensure perfect wet contact, you can mount probes on robotic arms or pass complex geometries through custom coils.
It handles hidden surfaces and weird shapes that would be a nightmare to check with a contact transducer.
Portable and Versatile
I used to assume that to get this level of sensitivity, you would need a massive rack of lab equipment. It turns out that is not the case anymore.
Modern instruments are battery powered, handheld, and light enough to carry up a scaffold.
There is another cool trick here involving the liftoff effect. While we usually try to minimize the distance between the probe and the part, the physics allows for a small gap.
This means you can inspect conductive materials through thin, non conductive coatings. You can check an aluminum aircraft wing for cracks without scraping off the paint first.
The magnetic field just ignores the paint and tests the metal underneath.
Limitations and Challenges
We have talked a lot about the superpower aspect of eddy current inspections. detecting flaws without removing paint or touching the surface is incredible.
But physics is rarely that generous without asking for something in return. It turns out, this method has some specific constraints that you need to understand before you rely on it.
The biggest hurdle is the fundamental requirement for conductive materials testing.
If the material does not let electrons move freely (like plastic, glass, or wood), it simply doesn’t work. If there is no current, there is no signal.
This restricts us entirely to metals and alloys.
Even inside a conductive metal, we have to deal with the Skin Effect. The currents crowd heavily on the surface and fade out exponentially as they go deeper.
This creates a depth limitation.
If you have a defect buried deep inside a thick slab of steel, the eddy currents might be too weak to see it by the time they reach that depth.
This makes the method fantastic for surface crack detection, but less effective for deep subsurface flaws compared to ultrasonics.
You also have to watch out for the End Effect.
> The magnetic field wraps around the probe like a bubble.
When you get close to the edge of a part, that bubble distorts because part of it is hanging in the air. This creates a massive signal that can easily mask a real crack located near an edge.
Variables Affecting Results
Because eddy current sensors are so sensitive, they pick up on everything that changes the electromagnetic flow, not just cracks.
This can make interpretation tricky because you are often fighting “noise” from variables you do not care about.
A classic gotcha is Lift off.
This happens when the distance between the probe coil and the part surface changes slightly.
If your hand shakes and the probe lifts just a fraction of a millimeter, the impedance changes drastically. The instrument might scream “Defect!” when the reality is just “Distance”.
- Conductivity Variations: Things like heat treatment inconsistency or temperature shifts can alter the material’s conductivity, shifting your baseline.
- Permeability: In magnetic steels, random magnetic variations can drown out the defect signal unless you saturate the part magnetically.
This sensitivity is why operator skill and reference standards are critical. You can not just turn the machine on and guess.
You need to calibrate the system against a known good part and known defects (like EDM notches) to teach the instrument what to look for.
This is not a fully automated ‘Pass/Fail’ method. The operator needs to distinguish between a signal caused by a crack and a signal caused by the probe tilting slightly.
Conclusion
We have covered a huge amount of ground here.
It is the electromagnetic induction principle doing the heavy lifting.
Think about it like this: by creating those invisible loops of current we turn the test part itself into a sensor.
We are effectively asking the electrons in the metal to report back on their surroundings.
When they hit a roadblock, like a crack or a void, they have to detour. That extra effort changes the impedance, and that is the signal we see on the screen.
It creates a feedback loop that gives us non-destructive sight.
This interaction is exactly what makes surface crack detection so powerful.
Since the currents naturally crowd the surface of the material (thanks to the skin effect), even the tightest fissure creates a massive roadblock for the electrons.
It is arguably the most sensitive way to handle conductive materials testing without actually touching the part or stripping away protective paint layers.
But remember, you cannot just grab a sensor and start scanning.
Selecting the right eddy current probe types (knowing when to use a differential probe versus an absolute one) is an important factor to get clean data.
You need to dial in your frequencies and calibrate against a reference standard every single time.
If you are managing a quality assurance program, this is a capability that pays for itself in peace of mind.
It allows you to catch failure points before they ever leave the factory floor.
So don’t be intimidated by the vector screens or the phase angles. Once you visualize those swirling currents in your head, the rest falls into place.
Frequently Asked Questions
What is the main purpose of eddy current inspections?
Eddy current testing is a non-destructive method used to check conductive materials for flaws without damaging them. It uses electromagnetic fields to create currents in the part you are testing. If there is a crack or defect, it disturbs these currents. You can detect these disturbances to identify the issue instantly.
How does the electromagnetic induction process work here?
A probe coil passes alternating current close to a conductive material. This action induces small circular electrical currents, called eddy currents, in the test piece. Any changes in the material, such as cracks or thickness variations, interrupt this flow. The probe detects these interruptions and signals that a defect is present.
Which materials are compatible with this testing method?
You can only use this method on materials that conduct electricity. Common examples include aluminum, copper, steel, and titanium. It works best on non-ferromagnetic materials. If you need to test plastics or ceramics, this method will not work because they do not support the flow of electrical induction currents.
What specific defects can this technology detect?
This method is excellent for finding surface and near-surface flaws. You can easily detect cracks, corrosion, pitting, and material thinning. It is also useful for measuring the thickness of non-conductive coatings, like paint, over a conductive base. However, it generally cannot detect defects that are located deep inside the material.
Does frequency selection impact the depth of penetration?
Yes, the test frequency directly determines how deep the currents flow into the material. Lower frequencies penetrate deeper, which allows you to see subsurface defects. High frequencies stay near the surface. You must choose the frequency based on whether you need to inspect the outer layer or check for deeper structural issues.
How do absolute and differential probes differ?
An absolute probe uses a single coil to detect general changes like conductivity or thickness by comparing the material to a fixed standard. A differential probe uses two coils to compare two adjacent sections of the material. This setup is better for finding small, localized defects like cracks because it ignores gradual changes in material properties.
What does lift-off mean in the context of inspections?
Lift-off describes the change in signal caused by the distance between the probe and the test surface. If the probe moves slightly away from the part, the magnetic coupling decreases. While this can create noise, you can also use this effect intentionally to measure the thickness of non-conductive coatings.
Why do ferromagnetic materials present testing challenges?
Ferromagnetic materials like carbon steel have high magnetic permeability. This property strengthens the magnetic field but limits how deep the currents can penetrate. The magnetic properties of the material can also vary randomly, which creates high noise levels. You often need to magnetically saturate the part to smooth out these variations during the inspection.
How does the impedance plane help characterize defects?
The impedance plane displays both the resistance and reactance of the test coil on a screen. When the probe encounters a defect, the signal trace moves. The direction of this movement usually indicates the type of defect, such as a crack or corrosion. The distance the dot moves typically tells you the size or severity of the flaw.