

How to mount the plastiform cartridges ?
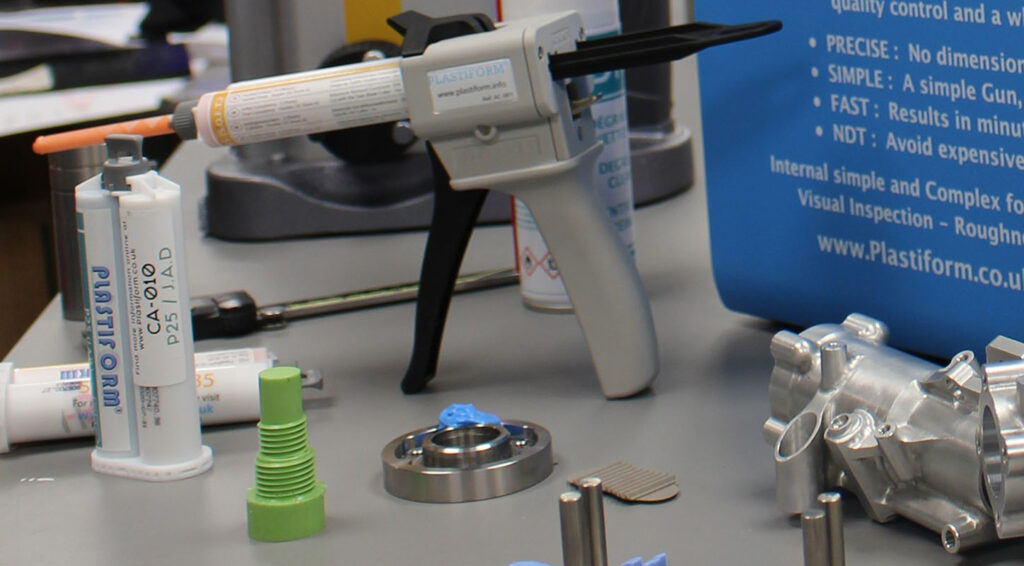
This video shows you how to mount the 50mL Plastiform cartridges on the DS-53 applicator gun. You will also be able to observe the assembly of the cartridge, injector and tip and the use of the assembly with the applicator gun. Before each application, check that the assembly is correctly mounted as on the video. Once the application is complete, you can throw the injector in a bin, the tip is reusable.
The Manual Applicator Gun by Plastiform
Mount the gun and the cartridge
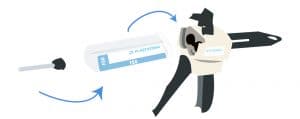
Before mounting the cartridge on the gun for use, it is important to equip the cartridge with its injector and tip. As a reminder, each injector has its own specificities, make sure you choose the right one before starting an impression.
If your injector supports the tips, then clip it to its end before mounting the injector on the cartridge. To clip it in, simply push the nozzle in at the outlet of the injector.
To equip a cartridge with an injector, remove its cap, then insert the injector instead. Rotate the injector once it is positioned on the cartridge to lock it. Your cartridge is ready to be mounted on the Manual Applicator Gun.
To mount the cartridge, follow these steps:
- Lift the black attachment on top of the gun.
- Raise the grey metal safety lock on the back of the gun and, when it is raised, pull the black tab as far as it will go.
- Position the cartridge in the gun. There is only one possible way to position it, if you have to force it in, it’s the wrong way to put it in.
- Close the black fastener on top and release the grey metal security.
The applicator gun is mounted and ready to inject your products in cartridges.
Apply a plastiform with the DS-53 applicator gun
When all the components are assembled, simply pull the handle (trigger) to start mixing the two-component component into the injector. Make sure not to let the product work too long in the injector where it could get stuck.
As soon as you pull the trigger, you may notice some resistance, especially when you reach the tip (or syringe, if you use a syringe injector). Do not insist on injecting the product faster, it is better to apply slowly to ensure a perfectly homogeneous mixture of the two components. In addition, if you insist, you could damage the injector or tip, and you could miss your impression.
When the impression is completed, you can disarm the gun by following the steps below:
- Raise the grey metal safety lock on the back of the gun and, when it is raised, pull the black tab as far as it will go.
- Lift the black attachment on top of the gun.
- Remove the cartridge.
- Detach the mixing injector and close the cartridge with its original cap.
The tips are reusable, wait until the product has cured inside the injector, then remove the tip by pulling it in the axis of the injector. The injector, on the other hand, must be thrown in the garbage.
These manipulations are the same for all products in 50mL cartridges.